Introduction: The Nostalgic Charm of Home-Milled Grains
There’s a certain magic that fills a kitchen when the aroma of freshly milled grain mingles with the warmth of the oven. It’s a scent that evokes images of simpler times, of hearth and home, and of a connection to the land that sustains us.
For homesteaders and those seeking a more sustainable life, milling your own whole grains is a powerful step towards reclaiming food sovereignty and nourishing your family with the wholesome goodness of nature. This guide will walk you through everything you need to know to get started, from choosing the right grains to baking delicious, nutritious creations.

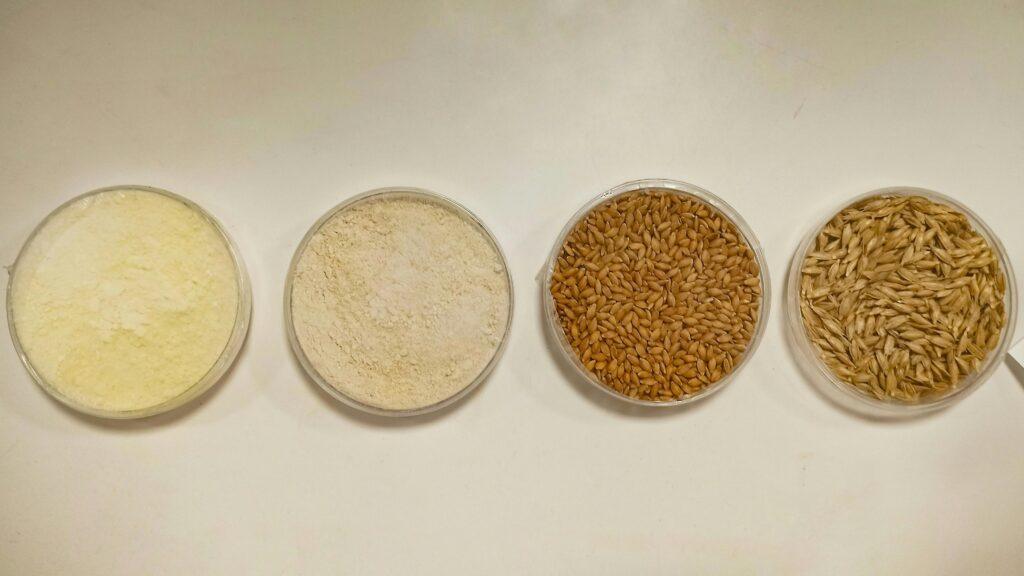
Types of Grain: A Homestead Pantry
The world of whole grains is wonderfully diverse, each offering unique flavors and nutritional profiles. Building a well-stocked homestead pantry starts with understanding the different types of grains and their best uses. Here are a few key players:
- Kamut (Khorasan): An ancient grain with a rich, buttery flavor. Kamut is higher in protein (around 16%) than all-purpose flour (8-11%), offering a nutritional boost. It requires less flour for conversions (7/8 to 3/4 cup) but can absorb liquid quickly. Kamut dough doesn’t stretch and fold as easily as some other grains and can be tricky to work with at first, but with the right technique, it produces a beautiful loaf with a good crumb and rise. It is available in whole wheat and white versions. A half-and-half blend offers the best of both worlds.
- Einkorn: Another ancient grain, einkorn has a delicate, slightly sweet flavor. While it folds well, it doesn’t stretch like bread flour.
- Spelt: A nutty-flavored grain that’s easier to digest for some. Like einkorn, it can be more challenging to work with than kamut.
- Hard Red Wheat: This is your go-to for hearty, flavorful bread. It has a high gluten content, which gives bread its structure.
- Hard White Wheat: Similar to hard red wheat but with a milder flavor. It can be used for bread as well.
- Soft White Wheat: Lower in gluten, this wheat is better suited for cakes, pastries, and other delicate baked goods.
Remember, all grains come in whole wheat and white versions. The whole wheat version retains the bran and germ, making it more nutritious. Consider what you’ll be baking most often when choosing your grains. Hard wheat varieties are ideal for bread, while soft wheat is better for pastries. Hard white wheat can be used for both. As you experiment you will develop a preference for your household use.

Storage: Keeping Your Grains Fresh
Whole grains are living foods, and proper storage is crucial to maintain their freshness and nutritional value. Store your grains in airtight containers, preferably glass or metal, in a cool, dark, and dry place. Pantry pests are a real concern, so inspect your grains regularly. Freezing can also extend their shelf life.
Mills and Milling Tips: The Heart of Your Freshly-Milled Kitchen
A grain mill is an essential tool for any homesteader wanting to bake with fresh flour. There are two main types:
- Electric Mills: These are convenient and efficient for larger batches. I love my Nutrimill and have been using it without problem since 2014.
- Hand Mills: These offer a more traditional, hands-on experience and are great for smaller quantities. We have purchased one for use in case of loss of power, but I sure wouldn’t choose to stand and mill flour by hand. What a grind!
When milling, start with a coarser grind and gradually adjust to your desired fineness. Don’t overheat the grains during milling, as this can destroy nutrients. Korashan Mills (korashanmills.com) is a great source for mills and flours, and Azure Standard is another excellent option.

Health Benefits: Nourishment from the Source
Freshly ground whole wheat flour is a nutritional powerhouse. It contains all parts of the grain – the bran, germ, and endosperm – providing fiber, vitamins, minerals, and antioxidants that are often lost in processed flours. Commercially produced “whole wheat” flour can be misleading. It is often refined and then fortified with some of the nutrients that were lost during processing. Freshly milled flour is far superior.
When I first met Sue Becker in 2011 at a homeschool convention in Georgia, I almost couldn’t believe my ears. The amount of nutrition lost just by this one societal “advancement” has been devastating to our nation’s health. If you have a moment, I would highly recommend Sue’s Healthy Minutes podcast and especially her talk on Real Bread.
Recipe Adaptation: Bridging the Gap
Converting recipes to use whole grain flour can require some adjustments. Kamut, for example, uses less flour (7/8 to 3/4 cup) in conversions. Remember that whole grains absorb more liquid, so you may need to add a little extra water or milk to your recipes. Also, whole grain doughs often benefit from a longer rise time.
Adding milk, eggs, butter to the dough will also create a more tender crumb for a sandwich loaf in a Pullman pan. An egg or a very ripe banana will serve to soften the crumb as well by giving additional food for the yeasts. These are called “enriched” doughs and they are very commonly used in sourdough baking.
Easing Your Family Gently into Whole Grains
If your family is accustomed to white flour, a gradual transition is key. Start by substituting a portion of the white flour with whole grain flour in your recipes. You can gradually increase the ratio as your family adjusts to the taste and texture.
Blending half whole wheat kamut with half white bread flour is a great way to introduce the benefits of whole grains without a drastic change in taste and texture.

Time Comparison: The Value of Slow
Milling your own grains and baking from scratch takes time, but it’s an investment in your health and well-being. It’s a return to a slower pace of life, where the process of creating food is as nourishing as the food itself.
How to Make Whole Grains that Cook Up Light and Fluffy
Achieving light and fluffy results with whole grains requires attention to a few key techniques:
- Gentle Kneading: Be gentle when kneading whole grain dough. Over-kneading can damage the gluten structure. Whole grains have bran that can slice into the gluten.
- Proper Rise: Allow your dough ample time to rise in a warm spot.
- Steam: Steam is crucial for achieving a good oven spring. You can achieve this by baking your bread in a Dutch oven or by placing ice cubes between the parchment paper and the side of the Dutch oven. Another method is to open bake the dough on a pizza stone with ice cubes placed on the four corners of the baking surface. This creates steam in the oven.
Conclusion: A Return to Simplicity
Embracing whole grains in your homestead kitchen is more than just a culinary choice; it’s a commitment to a healthier, more sustainable way of life. It’s a connection to the past, a celebration of the present, and a gift to the future. As you grind your grains, mix your dough, and savor the aroma of freshly baked bread, you’ll discover the simple joy of nourishing your family with the wholesome goodness of the earth.

Have you signed up for our Dixie Delights newsletter yet? If not, what are you waiting for? You could be hearing us weekly as we share from scratch recipes, homestead happenings, and general tips for living a more sustainable life…the simple life.